OK cats, strap in for this one. It's a long one. We've got this long piece that we're going to be adding a sheer buttload of details to.
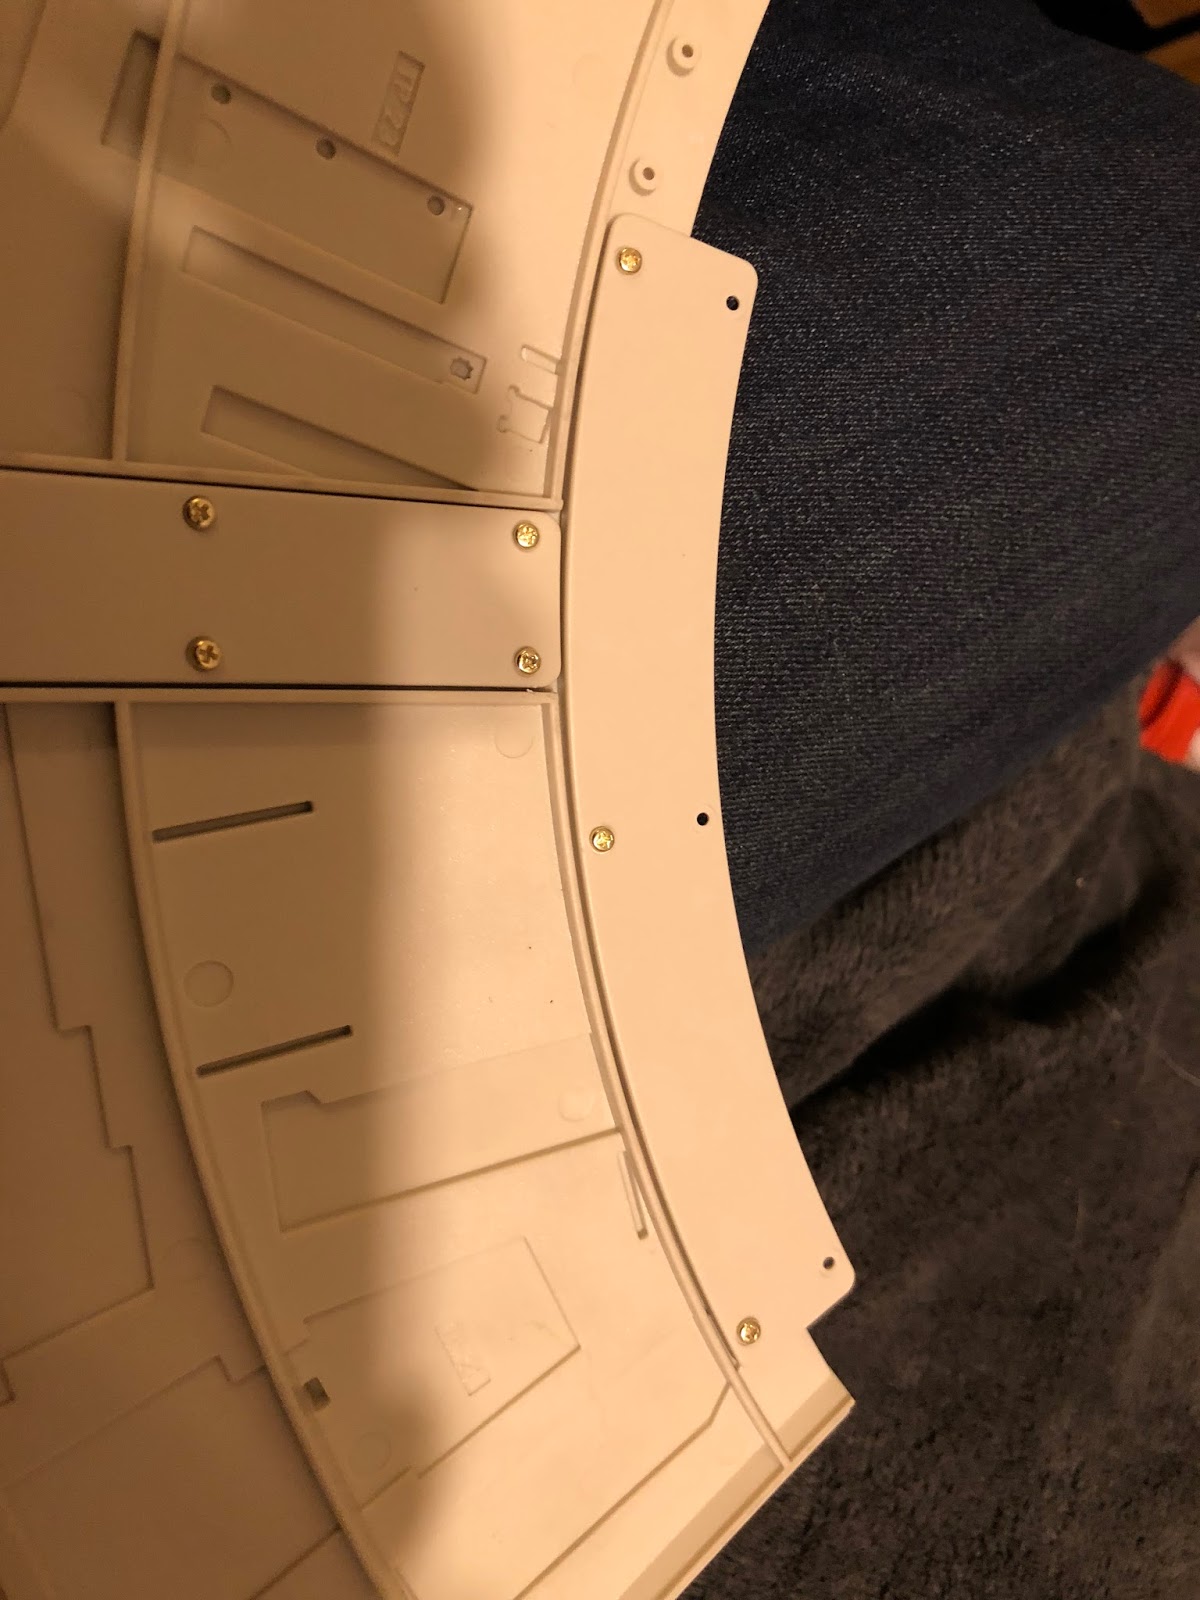
We start off with this corner:
...and apply detail, so:
Other side, same deal (MOST of these are going to be mirror objects. I'll note the ones that aren't):
Next, we add this piece to the front:
Up top (aft) go the next two:
On these, make sure to note which way up they go.
This one hangs over the edge; this is by design.
Next come these two.
Now these half-cylinders. Note the tapered side is aimed forward.
Next come these two little strips (again, pay attention to orientation):
Now these details go on next to them:
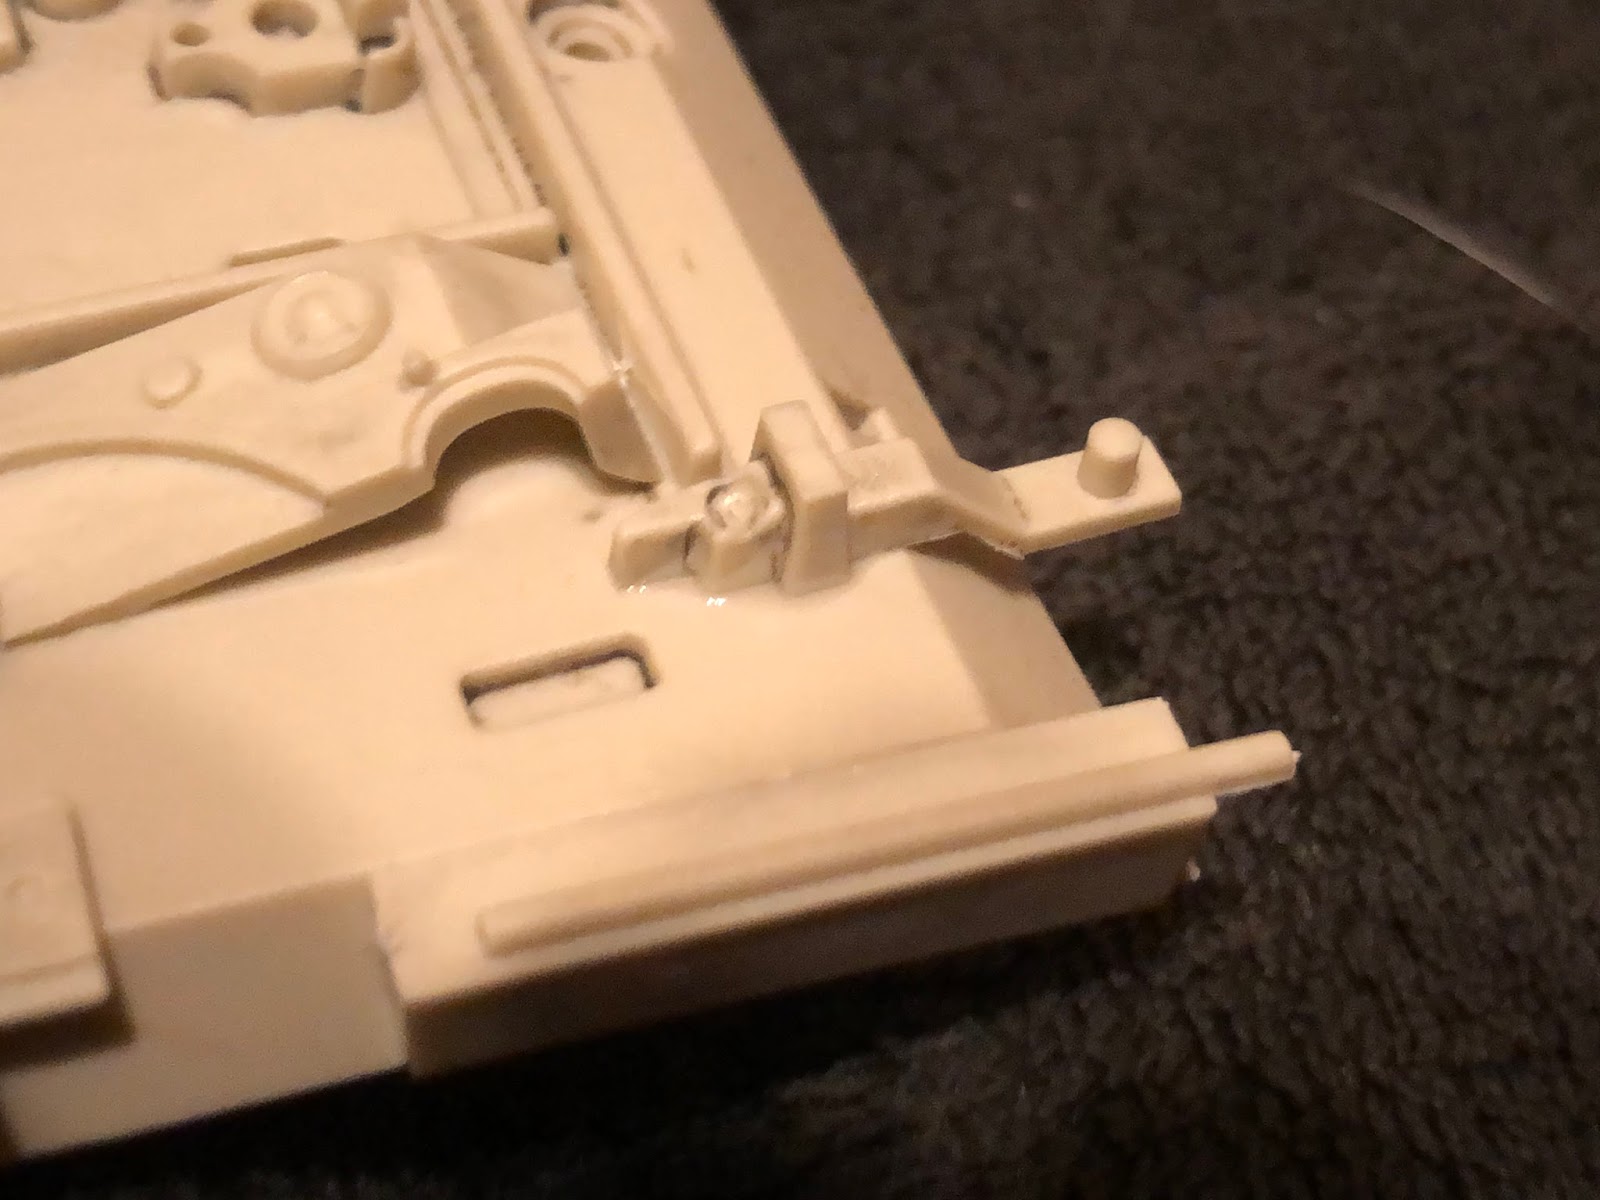
Now the little "arm" detail goes on the side shown.
This part is very delicate, and can be difficult. I'd be very careful with it, and you may want to keep it in place while the glue does its thing.
This bit goes on the corner shown.
...and this detail goes on the opposite side.
Another extra-thin detail goes in the place shown:
And this bit goes so it's going into the part we added previously (there isn't one for the other side, interestingly; I can't help but suspect there might have been at one time on the original prop, but it probably got knocked off or something).
Finally, this little detail goes on in the direction shown.
Well, that's mostly it. It's looking a lot better now, but you'll notice there's at least 4 holes waiting for stuff to add on. I'm sure we'll attend to them in good time.
Friday, November 17, 2017
Monday, November 13, 2017
Issue 69
We're picking up where we left off last time, and adding another curved connector, as shown:
Next goes the last straight connector:
And the new body panel gets connected to both.
Here's the end result seen from above:
...and here it is temporarily placed over the frame.
Later, we'll go back and place details for the engine vents, and also greeblies to cover up the seams between the pieces.
Next goes the last straight connector:
And the new body panel gets connected to both.
Here's the end result seen from above:
...and here it is temporarily placed over the frame.
Later, we'll go back and place details for the engine vents, and also greeblies to cover up the seams between the pieces.
Issue 68
Now in this issue we will work a little on the rear shell. First off, we take the following two body parts shown:
Now flip them over, and use one of the straight connectors shown (please note these only fit one way, so make sure the holes are lined up properly):
You should have gotten a bunch of long gold screws. You'll use them all for this. Let's start with securing this panel:
Now another straight connector on the side:
And a curved connector on top as shown:
This piece attaches to that (note you may have to do some finagling to get this new piece flush with the lower part):
And here's the end result seen from the top.
Monday, November 6, 2017
Issue 67
OK, sorry for the delay. Busy with lots of other stuff. Anyway, another exposed area (I never noticed there were so many...).
We start with the base part, and add the little vertical piece in the middle, so:
Now, the big part goes down over it.
Then the next several pieces go on in the order shown:
(note the alignment on this one; it's a bit tricky)
When you're done, the part should look like this:
Now, we give it a nice layer of weathering and grime, and...
Subscribe to:
Posts (Atom)