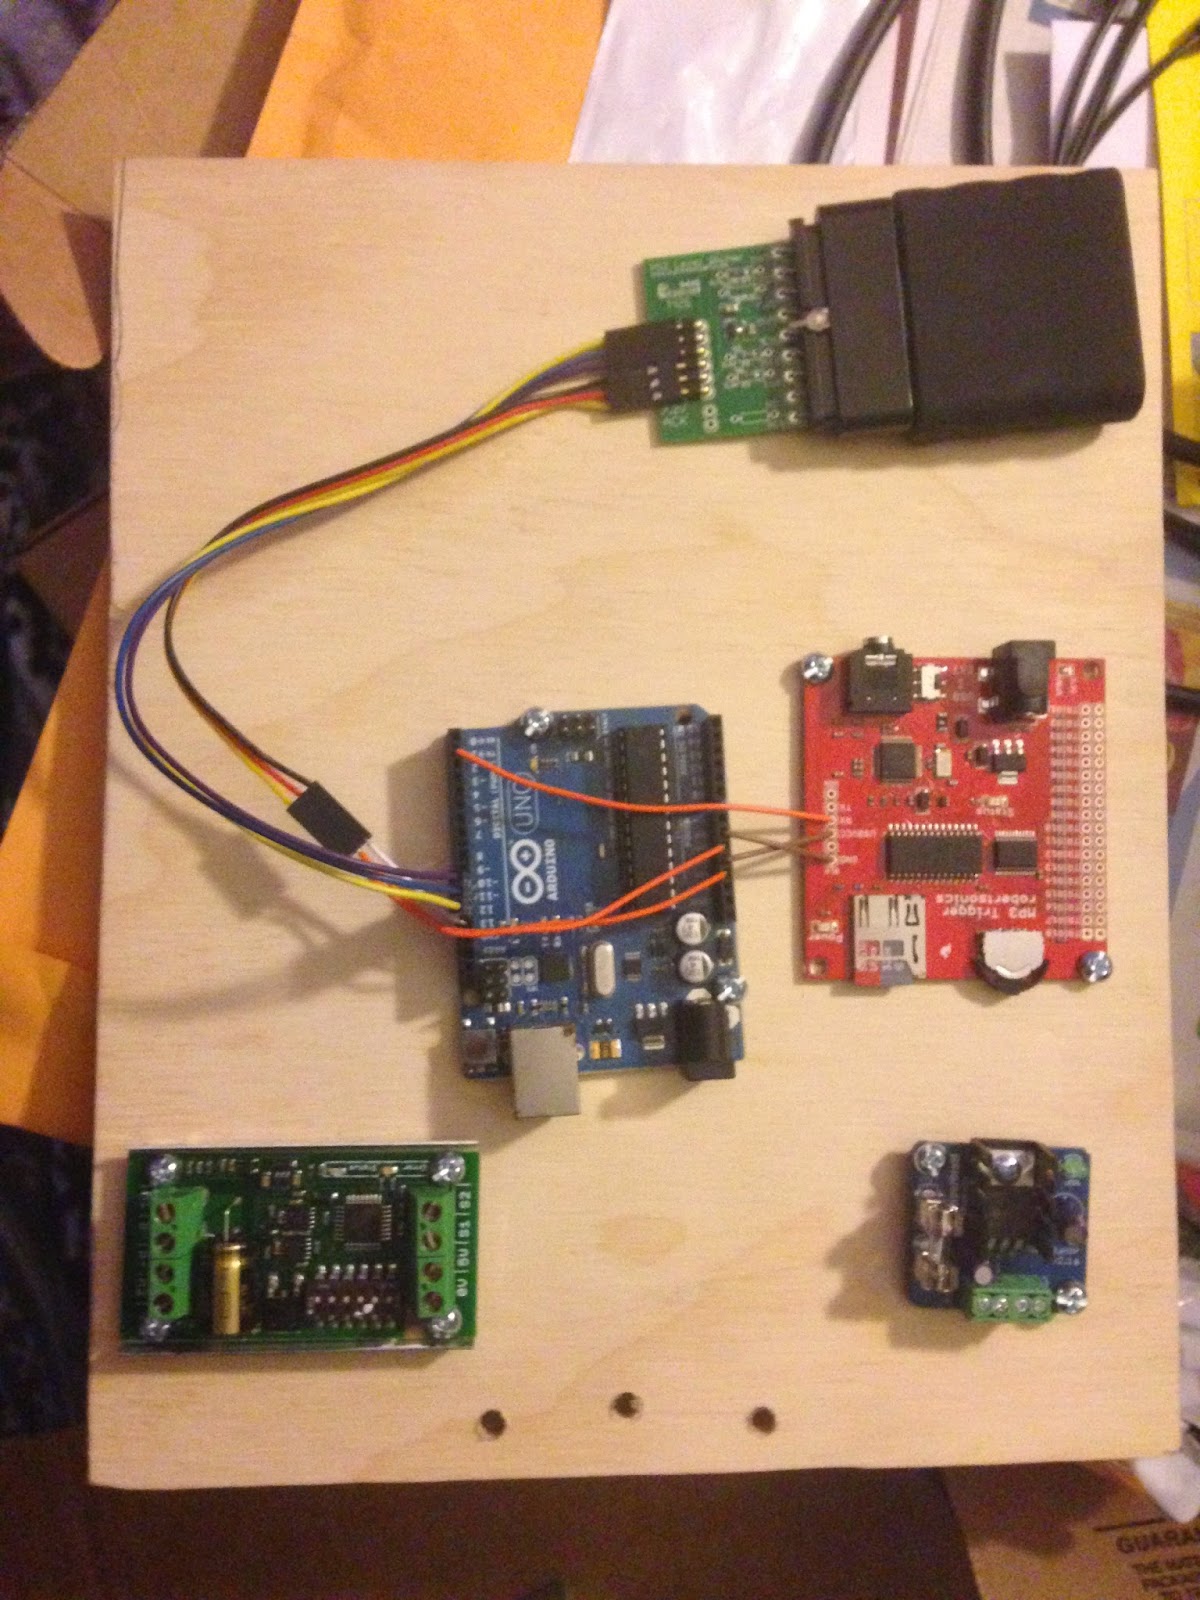
From top to bottom that's the playstation 2 remote control receiver, the arduino that runs everything (in blue), the mp3 player (in red), the motor driver for the dome motor (on the left) and the 5V regulator for the dome lights and speaker (on the right). Since the battery is 12V, I need to run it through the voltage regulator to feed the dome lighting system.

Incidentally, here you can see the slip ring in the middle of the dome which feeds the power up. You can see I've attached a small quick-connect plug on the end there, and bundled up the wires so they're not kicking around all over the place.

And here's the motherboard bolted inside the R2 unit. There's a hinge n the back so it will fold down, and I'm using velcro tie-downs to hold it up. The shot is a little dark, but you can see a lot of wires going up the right-hand pole to the dome motor, dome lights, and speaker (the black rectangle in the top foreground). It's one of those USB powered ones, so since USB is a 5v draw, I was able to put it in with the dome lights downstream from the regulator. Kind of a pain though, as once I snipped off the USB plug, the actual power wires within were very tiny, maybe 24-26 gauge.
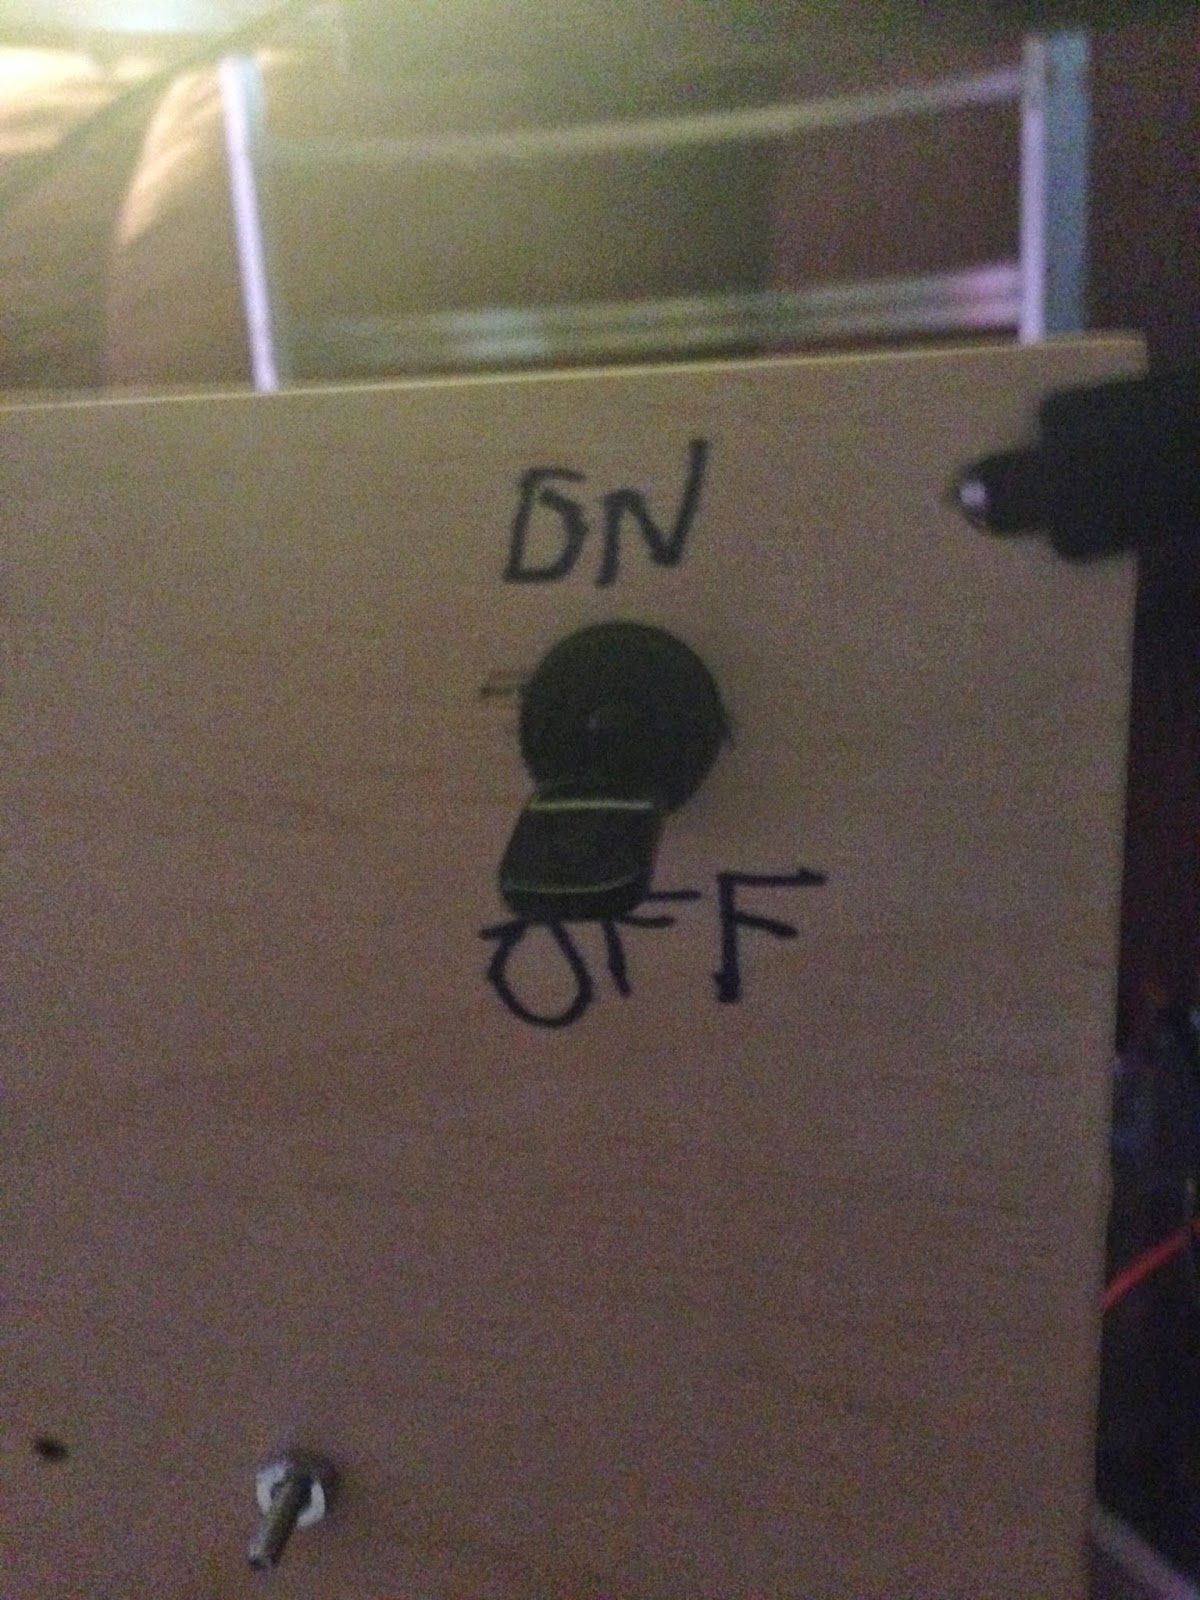
On the back I mounted a big ol' power switch (I'm actually going to have to replace it with a DPDT (double-pole, double-throw: that means I can turn two circuits on at once) switch later, as I'll want this to toggle both the 12V and 24V circuits at the same time. The 24V circuit will be strictly for the foot motors, actually moving this sucker around).

And here's R2 on his brand new handtruck, ready for his debut :)
I think this week I might get back to 3-D printing body parts. After the con I'd really like to tackle as much body stuff as possible,and work on getting the legs together. Then snag some skins as soon as a set show up, and after that... I gotta figure out how to move this sucker around.
Oh, boy.
.jpg)