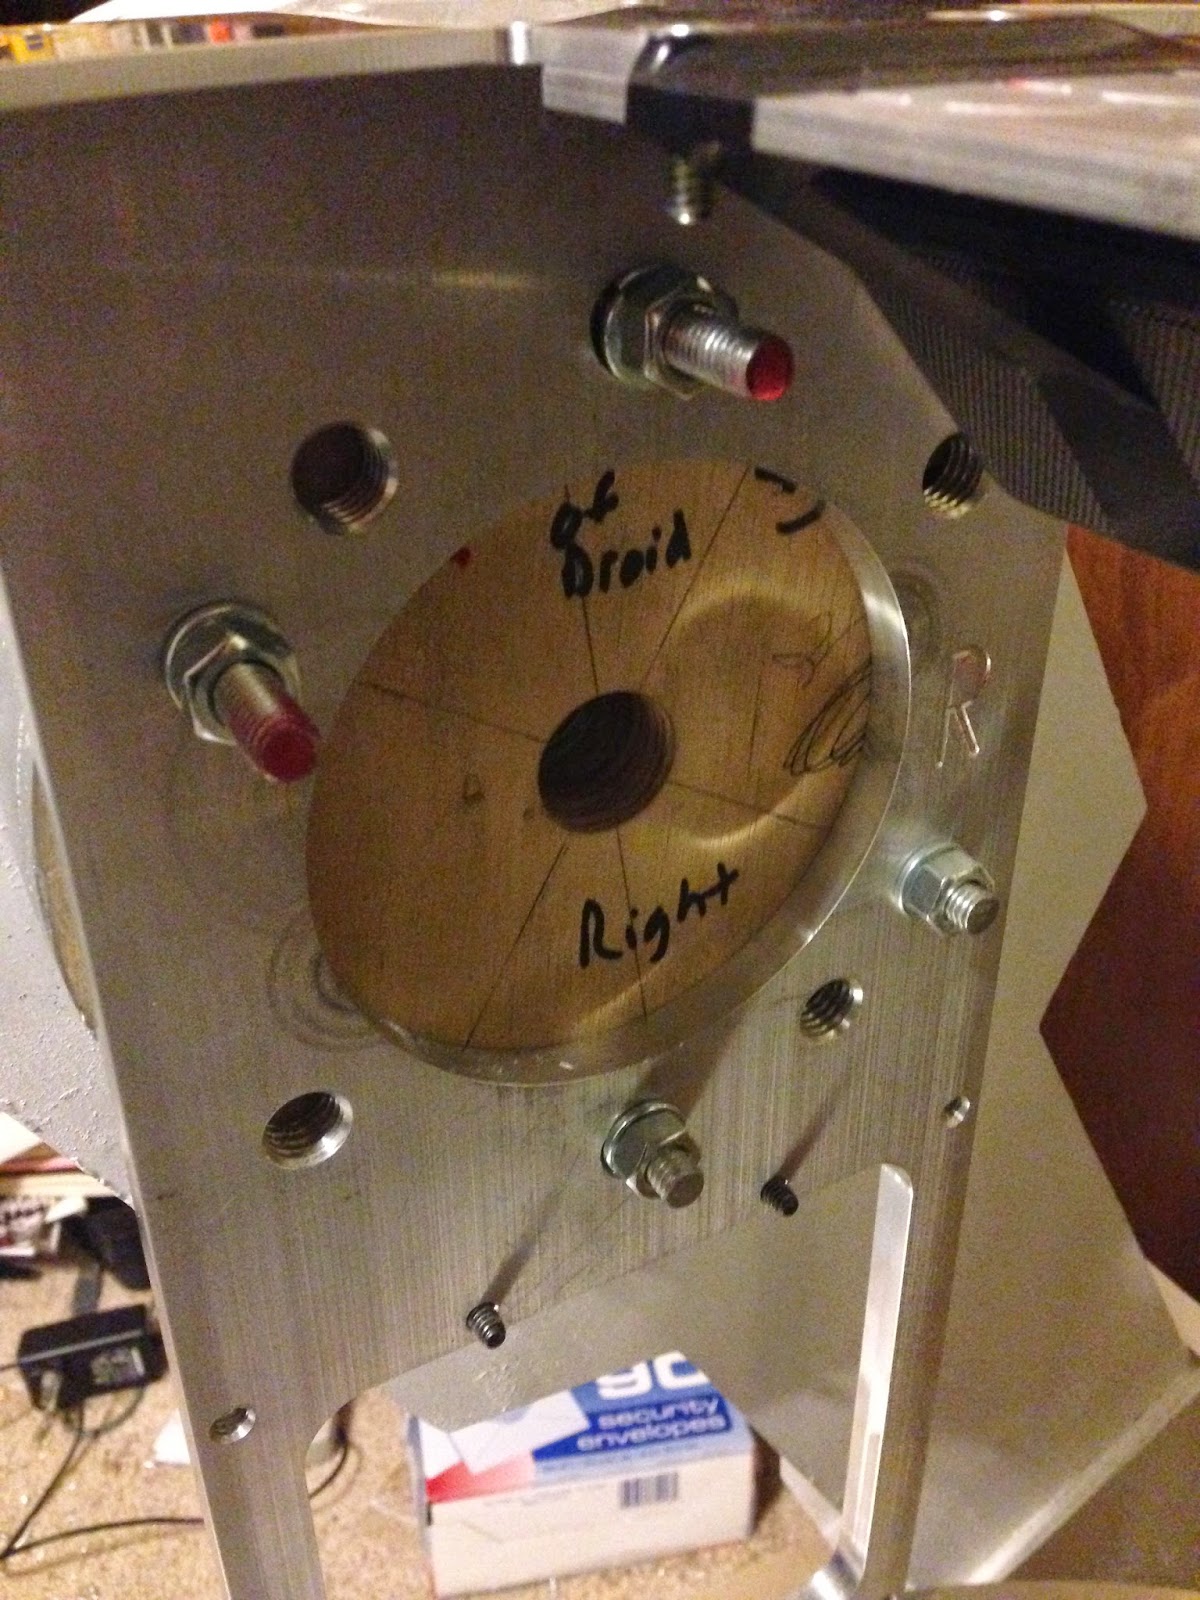
So last night I put the first leg on. It was pretty awesome. I had originally planned on feeding a bolt out through the frame holes, through the shoulder hub, and into the leg sockets, but that proved to be a royal pain in the butt getting everything lined up properly. So instead, I snagged some threaded rods and put them in the legs first. Then I dropped the shoulder hubs down onto the rods, put them through into the frame, and fastened them with nuts and lock washers, thus:
Due to the 4-6 difference, I had to do some extra drilling and only had 4 holes in. But if 4 is good enough for the aluminum legs, it oughta be good enough for the wooden ones.
Anyway, while I had the dome ring off (I had taken it off to put the skin mount points on before the legs went on), I finished off the utility arms. It seems I hadn't noticed it but the frame kit came with the proper mounting hardware for the arms, so I went ahead and put 'em on while I was at it. So at the end of tonight, R2 was looking like this:
(also pictured, my faithful assistant Uzume)
So anyway, the next step is the center ankle. It turns out I had the hardware for an aluminum center ankle, but there's a different one for the wooden version. Which I didn't know. But the frame guy is swapping me this week, so hopefully I'll have the proper hardware in my hands soon, and I can put on the center ankle, followed by the wheels and foot drives, and R2 will be standing on his own 3 feet. Can't wait.
Showing posts with label utility arm. Show all posts
Tuesday, April 14, 2015
Saturday, February 7, 2015
Yet another utility arm
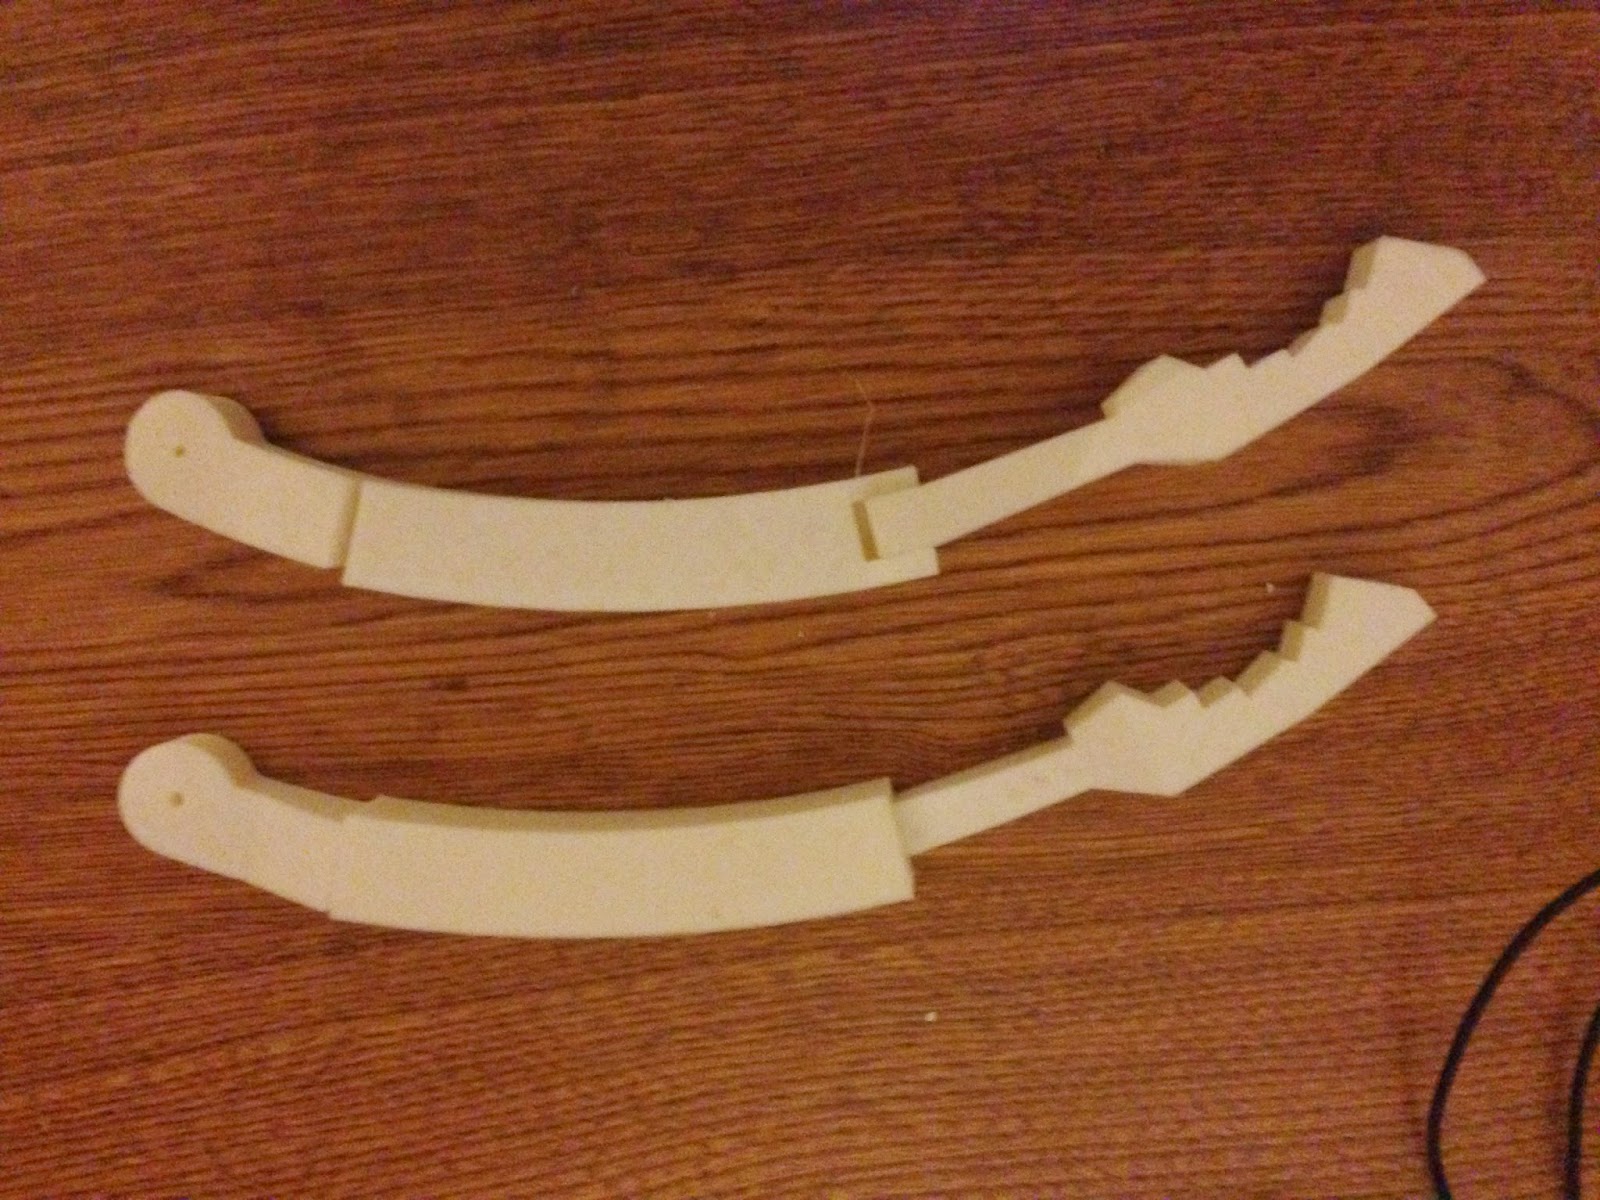
So a new version of the utility arm has been released, this one a stationary version. I gave it a go and it came out looking all right. Certainly a lot smoother:
They come with a box that you mount the arm in (you can see mounting slots in the upper part of the arm above). I haven't printed those yet, so I'll have to see how they look.
Wednesday, January 7, 2015
And now, for a few words about mistakes...
Just to be clear, this is by no means an expert blog. It is me documenting my attempt to build this 'droid, both for my own future reference and for others to pick up and learn from. And part of that is me making mistakes and documenting them so that I don't do them again, and hopefully others can avoid them altogether. Let's have a look at the utility arm print I did as an example.
This morning before work I did the final sanding, and glued all the bits together. This evening, the paint came out, and I gave it the standard Krider blue treatment. Here is the result:
Looks good in this picture, doesn't it? But let's look a little closer, take in a few details:
Gyhhh, what's that? I'm afraid that's carelessness. I waited for the top paints to dry, then rolled it over to paint the bottom. Unfortunately, I positioned it on a part of the newspaper that was still wet, so it stuck. By this point I had already decided this was a no-go, but I sprayed it real quick to see what it would look like. As you can see, the result is not great.
As you can also see, the seam is really quite visible. Even after last night's adventure with the belt sander, the seam (which is quite smooth to the touch) is nevertheless quite visible at all join spots. Which leads us to the second mistake:
I basically tried to "paint over" the seams to cover the blemishes and faults. Unfortunately, that's a bad idea. Painting should be done in short bursts back and forth, not blasting full throttle. I have the worst time with that. Here you can see the paint has flowed down to the end of the arm and puddled up horribly. So yeah, painting over your surface issues does not work.
Speaking of surface issues:
You can see where where I joined some sections together and tried to smooth the transition with XTC-3D instead of bondo or similar. Part of it seems OK, but there's that big bit on the end. And also I didn't take time to sand it down properly, as you can see.
Anyway, I spent a lot of time trying to make up for the fact that this isn't a single piece. More skilled hands might have pulled it off, but I unfortunately could not. So, lesson learned: I'll be getting this as a resin cast version.
Meanwhile, still acquiring bits and pieces for the Teeces lighting system. My components and the boards are on the way, and I just ordered a bunch of LEDs (you need just shy of 300 for the full setup; I got 600 bulk for just about $20). Due to advice on the boards I avoided the "water clear" LEDs and went for the actual tinted ones. Some of them are flangeless but a box of mixed I got for the 5mms are flanged. The boards advise taking nail clippers to them. I'll let you know how that goes.
This morning before work I did the final sanding, and glued all the bits together. This evening, the paint came out, and I gave it the standard Krider blue treatment. Here is the result:
Looks good in this picture, doesn't it? But let's look a little closer, take in a few details:
Gyhhh, what's that? I'm afraid that's carelessness. I waited for the top paints to dry, then rolled it over to paint the bottom. Unfortunately, I positioned it on a part of the newspaper that was still wet, so it stuck. By this point I had already decided this was a no-go, but I sprayed it real quick to see what it would look like. As you can see, the result is not great.
As you can also see, the seam is really quite visible. Even after last night's adventure with the belt sander, the seam (which is quite smooth to the touch) is nevertheless quite visible at all join spots. Which leads us to the second mistake:
I basically tried to "paint over" the seams to cover the blemishes and faults. Unfortunately, that's a bad idea. Painting should be done in short bursts back and forth, not blasting full throttle. I have the worst time with that. Here you can see the paint has flowed down to the end of the arm and puddled up horribly. So yeah, painting over your surface issues does not work.
Speaking of surface issues:
You can see where where I joined some sections together and tried to smooth the transition with XTC-3D instead of bondo or similar. Part of it seems OK, but there's that big bit on the end. And also I didn't take time to sand it down properly, as you can see.
Anyway, I spent a lot of time trying to make up for the fact that this isn't a single piece. More skilled hands might have pulled it off, but I unfortunately could not. So, lesson learned: I'll be getting this as a resin cast version.
Meanwhile, still acquiring bits and pieces for the Teeces lighting system. My components and the boards are on the way, and I just ordered a bunch of LEDs (you need just shy of 300 for the full setup; I got 600 bulk for just about $20). Due to advice on the boards I avoided the "water clear" LEDs and went for the actual tinted ones. Some of them are flangeless but a box of mixed I got for the 5mms are flanged. The boards advise taking nail clippers to them. I'll let you know how that goes.
Tuesday, January 6, 2015
More fun with the utility arm
So after gluing the three sets of half-components together last night, I brought them in to the makerspace after work to sand down the seams:
This largely went well, the only main problem being that on one piece I accidentally sanded the top layer off (if you look at the picture below, you can see the damage on the left).
Fortunately, this is fixable. I broke out the XTC-3D and slopped some over the damaged area, as well as the seam where the other two components were joined, as seen below. I'll let them cure overnight, sand, and I should be ready to combine them and paint.
Meantime, holding off on printing any other components for now. A major resin part maker is having a "scratch-and-dent" thing going on, so I'm trying to see what I can snag--almost got some holoprojectors, but a miscommunication happened. Oh well. I can always get the pristine ones.
Actually, I think I may be getting close to the end of what I can 3-D print. Mostly ankle and foot parts, and some large bits that aren't really condusive to 3-D printing, better off getting as resin cast. For example, the boosters on the side of the legs come in 3 parts which are hollow but that leaves a lot of empty space for support structures when printing. Then there's the "skirt" that goes under the main barrel. I did some tests yesterday and worked out that to print it (in PLA at least) would cost a bit over $120 in PLA using standard settings and a 20% fill rate. On the other hand, A&A does a styrene one for $60, so...yeah.
In the meantime, I'm concentrating on the dome, and particularly the dome light system. I'm goign with Teeces, which is based off of arduinos and has multiple "sketches" (arduinese for programs) including random blinkenlights and one that would let me control them via an iPhone app (once I wire up a wifi connection and all that jazz. That can wait.) I ordered the set of 5 bare boards for it, and a bunch of the standard ICs, resisters, sockets, etc with which to populate the board. Good thing the makerspace has a soldering station. I'll be sure and detail every step of it when I create the lighting system.
Until that stuff all shows up? Well, I've got plenty of dome stuff to do.
This largely went well, the only main problem being that on one piece I accidentally sanded the top layer off (if you look at the picture below, you can see the damage on the left).
Fortunately, this is fixable. I broke out the XTC-3D and slopped some over the damaged area, as well as the seam where the other two components were joined, as seen below. I'll let them cure overnight, sand, and I should be ready to combine them and paint.
Meantime, holding off on printing any other components for now. A major resin part maker is having a "scratch-and-dent" thing going on, so I'm trying to see what I can snag--almost got some holoprojectors, but a miscommunication happened. Oh well. I can always get the pristine ones.
Actually, I think I may be getting close to the end of what I can 3-D print. Mostly ankle and foot parts, and some large bits that aren't really condusive to 3-D printing, better off getting as resin cast. For example, the boosters on the side of the legs come in 3 parts which are hollow but that leaves a lot of empty space for support structures when printing. Then there's the "skirt" that goes under the main barrel. I did some tests yesterday and worked out that to print it (in PLA at least) would cost a bit over $120 in PLA using standard settings and a 20% fill rate. On the other hand, A&A does a styrene one for $60, so...yeah.
In the meantime, I'm concentrating on the dome, and particularly the dome light system. I'm goign with Teeces, which is based off of arduinos and has multiple "sketches" (arduinese for programs) including random blinkenlights and one that would let me control them via an iPhone app (once I wire up a wifi connection and all that jazz. That can wait.) I ordered the set of 5 bare boards for it, and a bunch of the standard ICs, resisters, sockets, etc with which to populate the board. Good thing the makerspace has a soldering station. I'll be sure and detail every step of it when I create the lighting system.
Until that stuff all shows up? Well, I've got plenty of dome stuff to do.
Monday, January 5, 2015
More ankle details and utility arm attempts
So the road cleaned up pretty decent, no problems getting in to work. Then over to the lab to pick up the prints from the weekend. This version of the utility arm is broken into six parts to aid in printing, as seen below:
Basically the two identical parts get epoxied together, and then all three parts are combined into one. For the first part, after sanding and all that, I broke out my old faithful loctite 2-part.
This is the heavy duty stuff, right here. Bonds fast, and hard. Quite a bit of my proton pack is held together with this stuff. Anyway, I glued and clamped each set of pieces:
And in no time had three hunks o'plastic. These will be going with me to the makerspace tomorrow to get properly belt-sanded so the seams don't show, and then more epoxy and the Krider blue treatment.
Hopefully this will work out. If not, there is a backup version of the arms but it's static (whereas these would be able to swing in and out due to a little hole going through the component on the right). Still, I'm going to go ahead with this one and see how it looks before trying the static one (I may print a static one anyway, just to make sure this one's properly sized and proportioned and all that).
In the meantime, I printed out the other two ankle details (for the right side) and gave them the same treatment as the left-side ones.
Anyway, I'm not looking more at the dome stuff. I found a few good build blogs covering other peoples' takes on the dome (see the helpful links list), so I'm studying that, including the fun of wiring up the lights and things. That should be fun. Ordered the blank breadboards and I'll have to acquire and solder all the bits and pieces on them, including over 200 LEDs. Hooboy.
Basically the two identical parts get epoxied together, and then all three parts are combined into one. For the first part, after sanding and all that, I broke out my old faithful loctite 2-part.
This is the heavy duty stuff, right here. Bonds fast, and hard. Quite a bit of my proton pack is held together with this stuff. Anyway, I glued and clamped each set of pieces:
And in no time had three hunks o'plastic. These will be going with me to the makerspace tomorrow to get properly belt-sanded so the seams don't show, and then more epoxy and the Krider blue treatment.
Hopefully this will work out. If not, there is a backup version of the arms but it's static (whereas these would be able to swing in and out due to a little hole going through the component on the right). Still, I'm going to go ahead with this one and see how it looks before trying the static one (I may print a static one anyway, just to make sure this one's properly sized and proportioned and all that).
In the meantime, I printed out the other two ankle details (for the right side) and gave them the same treatment as the left-side ones.
Anyway, I'm not looking more at the dome stuff. I found a few good build blogs covering other peoples' takes on the dome (see the helpful links list), so I'm studying that, including the fun of wiring up the lights and things. That should be fun. Ordered the blank breadboards and I'll have to acquire and solder all the bits and pieces on them, including over 200 LEDs. Hooboy.
Subscribe to:
Posts (Atom)