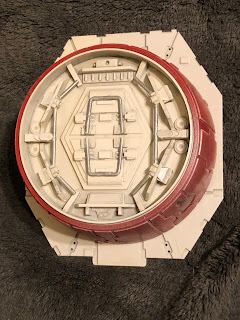
Quick update: looks like my new-style cone will be showing up tomorrow, so that will be nice. Have that well in time for the con (assuming I even bring it. Not sure.) Anyway.
OK, time to finish off the sides. First off, let's do the airlocks. You should have two complete sets of airlock assemblies, thus:
Please note the difference between the two: the top one has a little "tab" camera left. That's actually the bottom of this assembly, and it matches up with the gangplank, so we know it's the starboard one. Bear that in mind as we go along.
Taking the starboard one, we add the side bar details on either side, thus:
Next come the two handle-looking things in the middle.
Now the detail cylinder goes around it (be sure to find and lien up the 3 notches so you know you have it oriented properly):
Now, do the same for the other one. You should have something like this:
Next (I'm a little out of order here; don't ask): take the 4 little wedge items, and glue them to the corners of the airlock assemblies. Here's one for example.
Get all 4 corners for each airlock.
One airlock (the port one IIRC) has a notch on the side. It gets this glue-on detail:
Now, let's attack the last two side panels. The first panel gets the following details in the order shown.
And here's the second one:
Quick and easy.
Now, that second panel gets mounted port aft, right by the sublight engines.
The first panel goes right next to it, slightly overlapping.
Now take this detail from the sprue, and glue it into position where indicated.
Next come the airlocks. Glue in the side panels as shown, starting with the port side since we're there (pay attention to the pattern of the panels on the part, so you know you have the right part & orientation):
Now, on the port airlock, it might not be immediately obvious which side is the top. Look for the detail in the photo below. That indicates the top of the part.
Glue it into place, making sure the tabs fit into the holes on the frame properly.
Now, add the side panels on the starboard side.
And now, the airlock. Note the tab is on the bottom as I mentioned before.
While we're here, let's add the last two bits. First this little bit to the aft of the power switch:
And this piece, just fore of it.
There we are. Looking pretty good all the way around. Next up, we attack the aft engine assembly.
Getting pretty close to done.


No comments:
Post a Comment