Before I get cracking on this issue, just a quick side note: got a word form ModelSpace that they are sending a replacement of the new model nose cone that was supposed to be in Issue 40. Actually I seem to have gotten the email twice--one said 1-2 weeks, one said 2-3. So it's anybody's guess if I'll get 1, 2, or 0 either before or after Planet Comic Con. Guess I'll just wait and see. In the meantime, I'm friction-fitting the present, old-style nose cone into place without glue. It will do for now.
OK, so time to add in some side panels. First off, however, we need to add some details. Make sure you have the following pieces:
On the first piece, add the parts as shown in the order shown.
Now, the next piece:
The middle bit gets put in loose as it will serve as the power switch.
Now, this piece gets a little addition...
...and finally the last piece gets the two remaining parts as shown here.
Now, it's time to attach them. WARNING! Once you start gluing these panels in, you won't be able to remove the top shell anymore. So make sure everything is as you want it. There is no turning back!
Okay. First off, screw the power switch to the panel with the loose piece in it, fitting the button in the loose piece as shown below.
Now, the loose part should stick out. You should be able to click it on and off. Test this now.
Make sure you get the power light on the mainboard when you turn it on (actually, the magazine has you test this after you glue in the panel. Seems a bit backward to me).
Once satisfied that it works, glue the panel in.
Alea jacta est, baby.
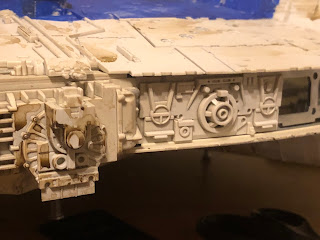
Now, take the panel shown below and put it immediately aft.
Next comes the one with the odd curve to it. Bet you can guess where that one goes.
Next, we switch to the port side, and add this piece just aft of the mandible.
Then this piece goes in after it.
Last up comes this piece, which goes right in between the two mandibles up front.
Next time, more side panels. Whee!


No comments:
Post a Comment